Interior Design Photoshoots: From Planning to Lighting
When it comes to photographing interiors, achieving the right balance of lighting and composition can be a challenge. That's why it's important to plan and prepare for a photoshoot day to ensure the best possible outcome.
In this article, we'll take a closer look at how we work with clients during a walkthrough to create a shot list, the process we use to compose each scene, and the different lighting options available to us to achieve the desired effect. Whether you're a designer, architect, or business owner looking to showcase your space, this article will help you understand the ins and outs of putting together a successful photoshoot day.
Planning Photoshoot Day
At some point before the shoot, we encourage having us out for a walkthrough. This is a collaborative process, where you’ll have an opportunity to communicate essential aspects of the project, show us the space's unique features, and inform us of any specific requirements or preferences you have for the images.
During the walkthrough any potential challenges or special opportunities will be noted. We’ll discuss different approaches to lighting and how each will come across in the final images. We’ll also be taking quick scouting photos so you can see how we’re interpreting your project through a camera lens and use these scouting photos to help finalize the shot list.
What We Do On Photoshoot Day
We welcome your participation during the photoshoot. Not only is it fun, but it’s a good opportunity for you to be involved in styling and to provide feedback while each space is being photographed.
Composing the Scene
Composition is always a challenge. The goal is to find the right composition that will lead the viewer’s eye through the frame so they can picture themselves in the space. We’ll use the final shot list as our starting point for composing each scene.
Once a composition has been defined, then it is time to simplify the image by arranging elements in the room so the viewer is not overwhelmed when viewing the final photograph. Oftentimes this can mean removing items from the scene. Once we have the composition set with intent then we determine how to best use lighting to achieve the desired effect.
Lighting Options
The challenge with interiors is balancing different types of lighting to create a natural and authentic representation of the space. Depending on the unique requirements of each project, we draw from a range of techniques to achieve the look we are after.
Option 1: Combine Natural/Ambient Lighting with Strobe Lighting
Using studio lighting is a slow and deliberate process. It takes more time to photograph each scene when blending natural/ambient light with studio strobe, but it can be worth it. The reason you may want us to take extra time with studio lighting is because it helps reproduce colors, contrast, and depth more accurately in a way that cannot be duplicated reliably when only natural/available light is used.
To do this we take multiple images of a scene. Some with lights on and some with lights off. We also use our studio lighting to fill in areas with light where none existed. All of these different images will be brought into photoshop and manually blended together in the final composite image.
Option 2: Natural/Available Light Only
There are times when available light is the only option that will work– e.g. strobe lighting will have little to no effect when photographing large spaces like a high school gymnasium or pool.
When used correctly, available light can produce high quality photos. The main downside of using available light only is it's not always possible to reproduce the color, contrast, and depth as accurately as can be achieved when accentuating a scene with studio strobes.
Using only available light allows us to photograph scenes more quickly. Available light photos will also require Photoshop work, but the process is generally not as time consuming as it can be when using strobes.
Whether to use natural/ambient lighting or strobe lighting for your project depends on several factors such as the type of scene, desired effect, and budget. Ultimately, either technique can produce professional images.
Example Homebuilder Photoshoot: Model Home Interior
To illustrate what was talked about in the above sections, here are some pictures from a recent interior design photoshoot for a homebuilder.
Scouting Picture
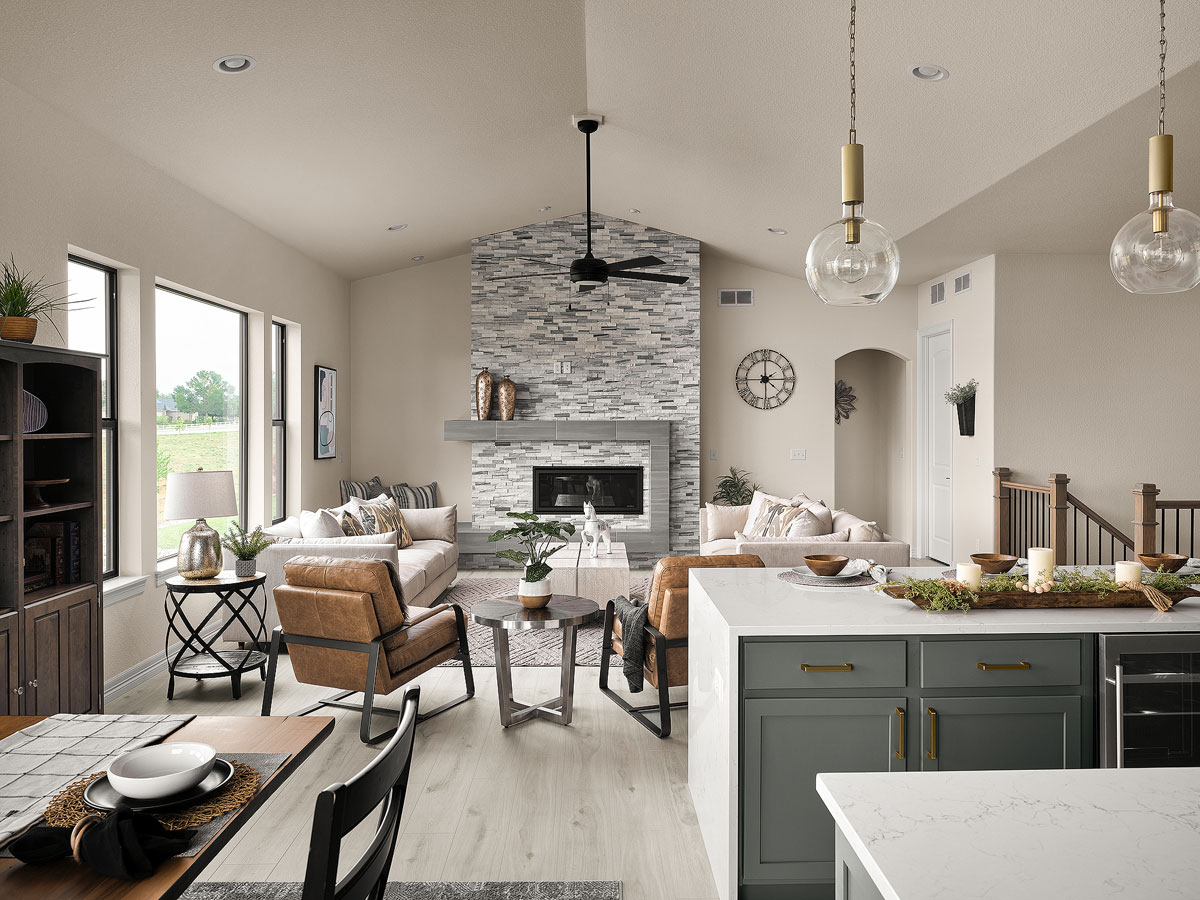
A couple days before the shoot the builder had us out for a walkthrough. They wanted an overall scene from the kitchen point of view looking towards the living room.
Here is the scouting photo taken with my iPhone:

From the point of view of the camera, the numbered areas are problem spots that need to be addressed when composing, lighting, and making the final image.
- vases are merging with the edge of the fireplace
- side table and lamp are too close to the couch, wires and vent will need to be hidden, and the view outside will need to be toned down
- corner of the table, chair, and recliner are on top of each other and there is a reflection on the floor and table that makes them blend together
- plant and coffee table props are on top of each other
- no separation between the items on the island
- door is open so you can see all the hinges
- lights are off, should they be on?
- this area is too dark
- this area could use some light as well
- another area that can use some additinal light
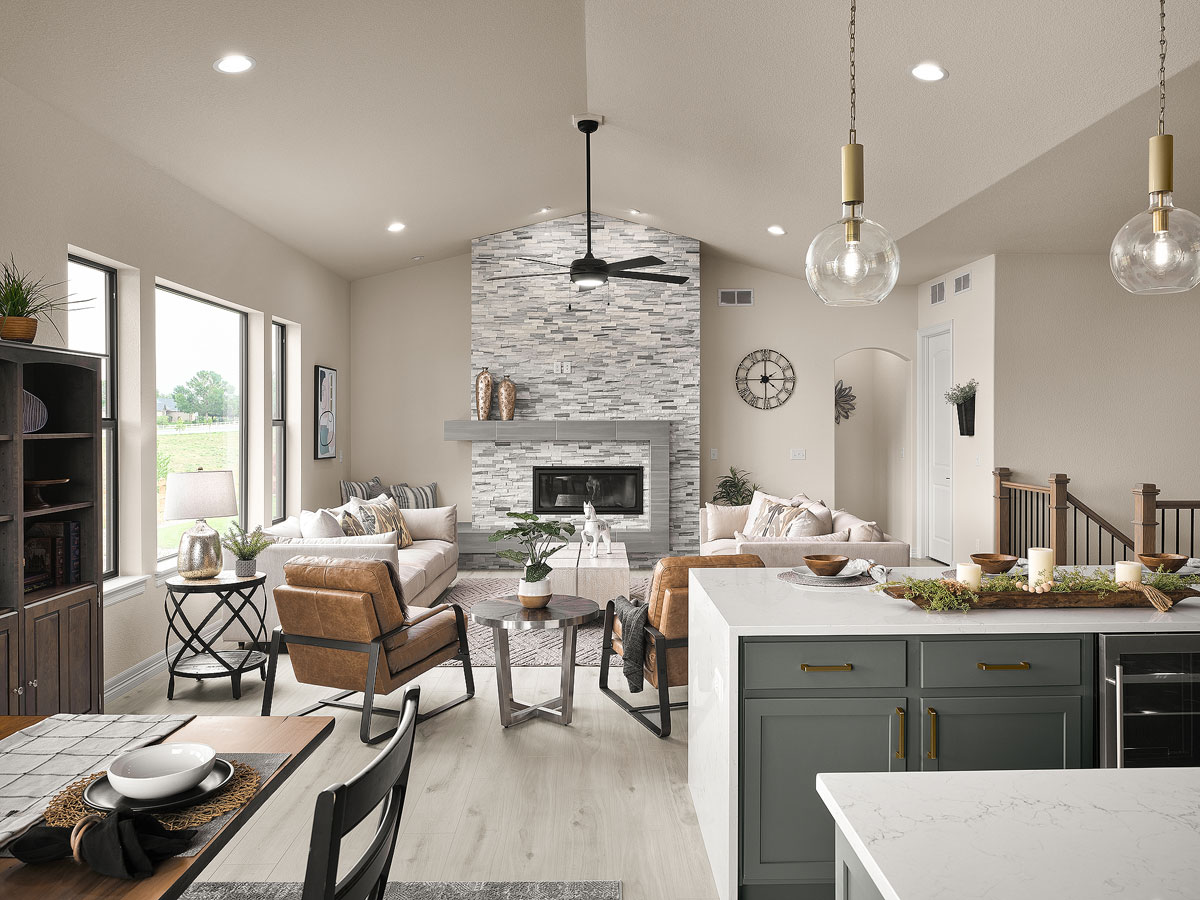
Composition and Lighting
This is the composition we put together. Notice how we’ve spaced things apart so they are not on top of each other, the lamp is framed by the window, the outdoor view is toned down, areas that were too dark have been brightened up, etc. All of these adjustments were made to the space without changing the overall feel of the design.
Lights On or Off?
When it comes to lights on or off, we can go either way. While photographing the scene, the client wasn’t sure which they would prefer so we did both. Here is the same image with the lights on.
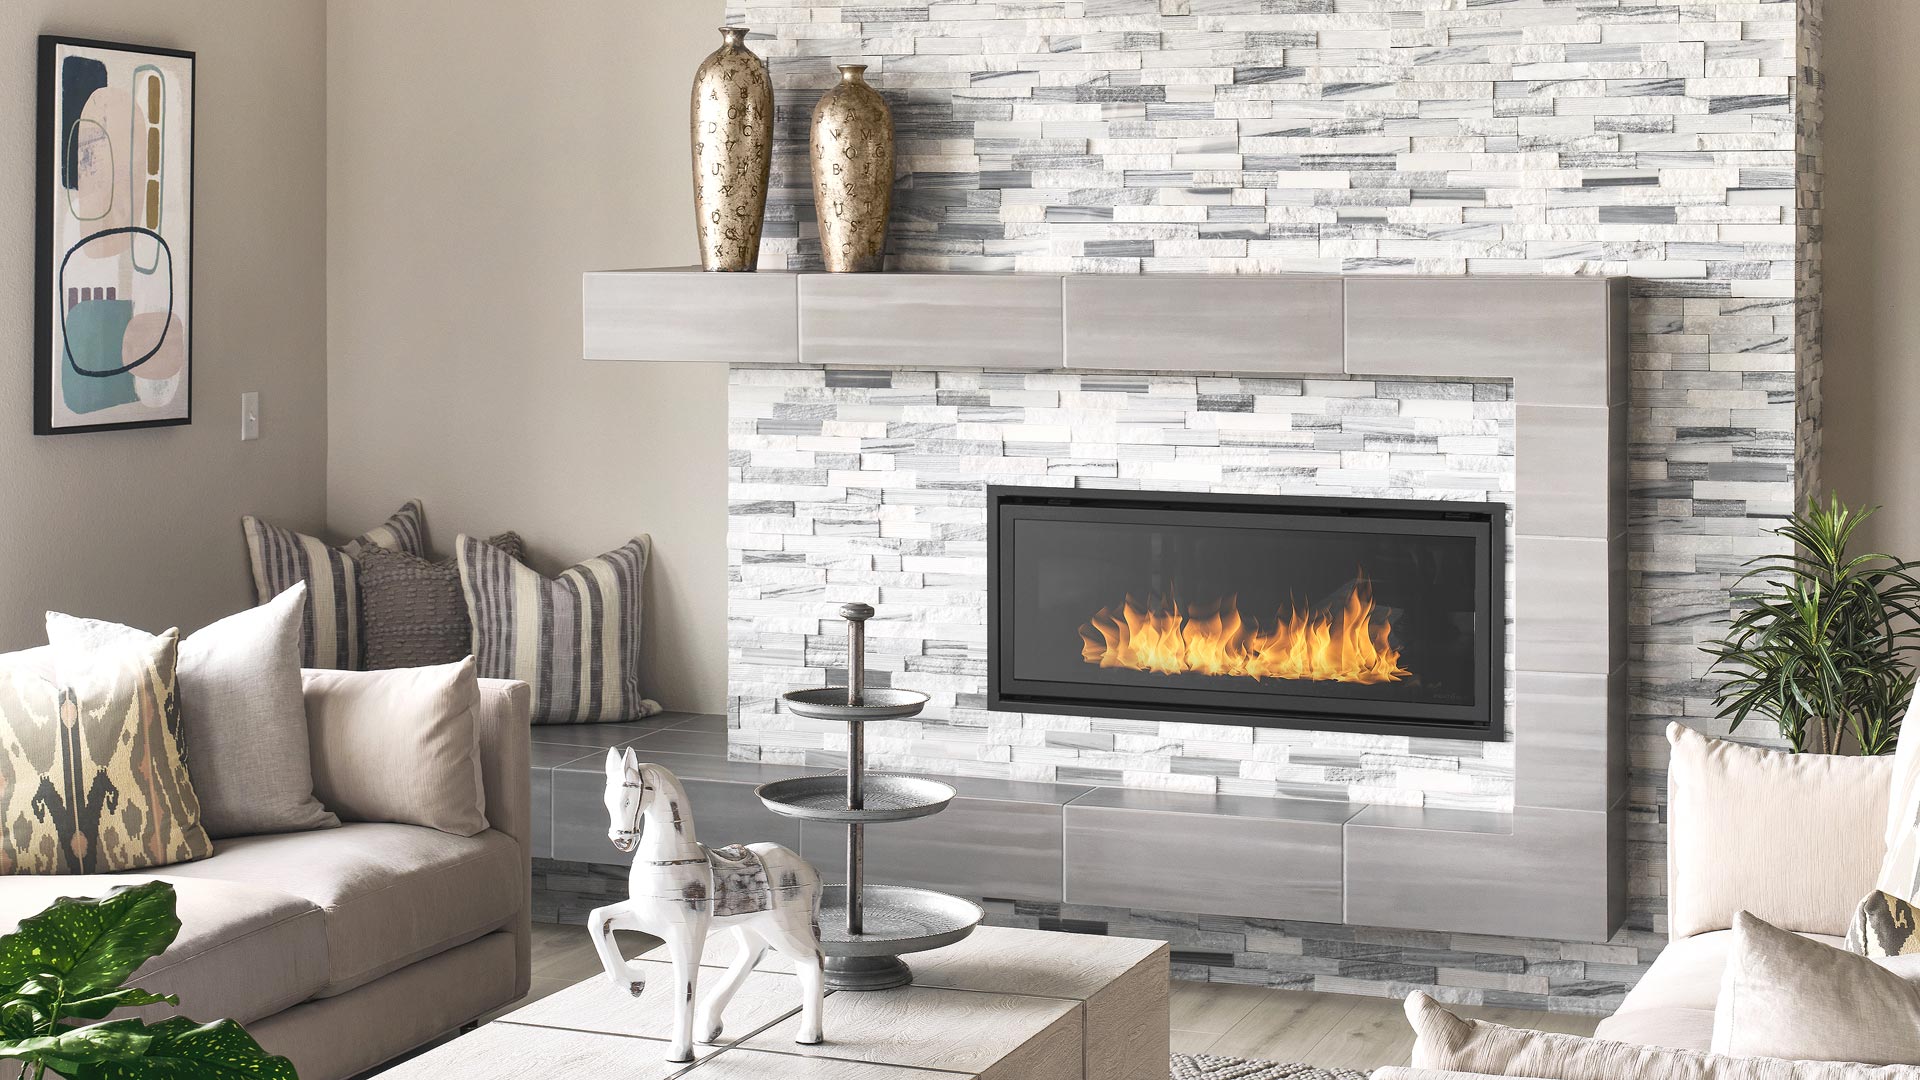
Simplifying the Scene
Capturing the overall scene in one image has its uses and we can understand why people want us to, but it doesn’t always make the best photograph. There is a lot to look at which can be overwhelming for the viewer.
Since we already figured out how to light the room I suggested to the designer that we move in tighter to focus on the living room and fireplace. They agreed that it would be worthwhile.

Ready to Showcase Your Interior Design Work? Let's Start Planning Your Photoshoot Today!
Creating stunning interior design photographs requires careful planning and attention to detail. At our photography studio, we work closely with architects, designers, and builders to ensure each space is photographed in a visually engaging and thoughtful way that reflects the work accurately and beautifully.
If you're ready to showcase your project through professional photography, we invite you to schedule a walkthrough with us today. Our collaborative process allows you to communicate essential aspects of your project, show us the unique features of your space, and inform us of any specific requirements or preferences you have for the images.
Whether you prefer the look of natural/available lighting or studio strobe lighting, our team has the experience and expertise to deliver professional images. Call us today at (970) 744-3611 or send us an email to schedule your walkthrough and get started on creating images that will help you showcase your work to the world.
 Fashion Gray
 Crimson
 Deep Yellow
 Tech Green
 Black
Black Purple
 Blue Jean
 Blue Jay
 Orange
 Primary Red
 Super White